Thursday, June 20, 2013

Edelweiss Dress Blog Tour


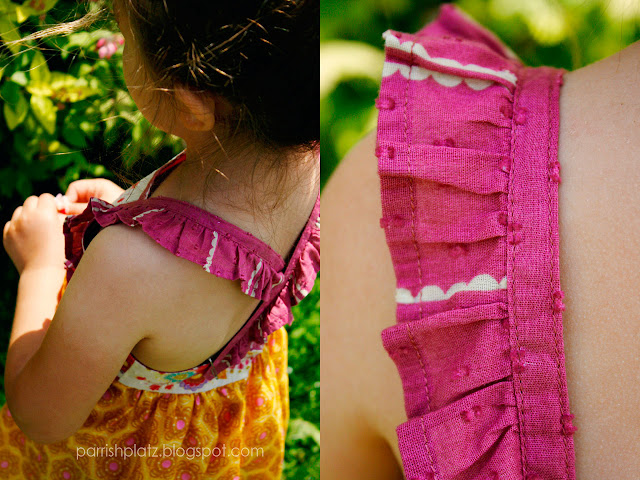
Today is my turn to show off the Edelweiss top I made Ava!
The pattern is called the Edelweiss Dress from Hey June by Adrianna over at Crafterhours
That woman is funny and sooo talented and inspiring but really it's the funny that I love the most! I know if we lived in the same place we'd be BFF's. I found Adrianna and her blogging sista, Susan, through my coworkers at the fabric store in Stuttgart. I can't remember where they were living but it was also in Europe! Americans in Europe; we search each other out! At that point I had only been in Germany for a couple of years and was soooo excited to "meet" other American bloggers overseas.  
So anyway, she had posted this dress and I immediately searched to see if I could buy the pattern. It wasn't out yet but she then said she needed testers and I (like the other ladies who wanted to test it) eagerly said I would LOVE to give it a go! I think this dress had me at the ruffles. And the fabrics she chose (here's the original that I fell in love with) were so adorable. As you can see I was inspired by her choices and made mine out of Anna Maria Horner Voile. It's perfect for voile. The little straps...sigh. they are sooo dainty and adorable on Ava's hairy shoulders and back...

I did not put the buttons on yet. I couldn't decide on straight in the back or criss-crossed and we had one beautiful day last week so I jumped at the chance to take the photos in pretty sunny weather not knowing it was going to be in the upper 90's this week. I think the criss-cross straps win. 
The bodice is lined in the same voile as the straps and I think I made a size 4/5? or Just 5? I can't remember how the sizing goes.. but it was super easy to make. I love how Adrianna writes her patterns. 
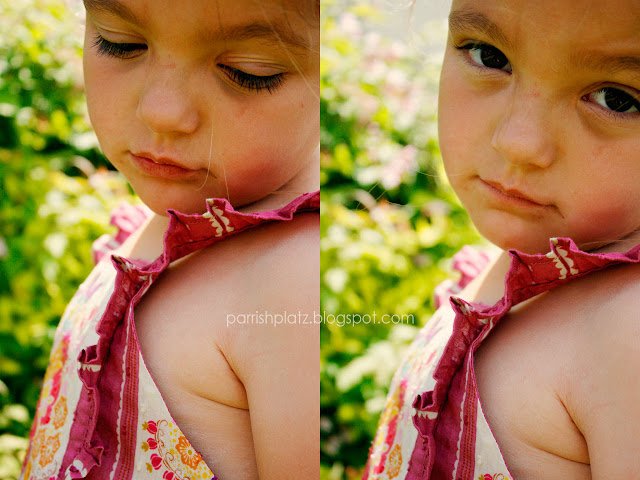
Below: I had to show this side underarm fat photo (and her dry skin). 
She was so done with me taking photos.
I opted to make the tunic version and not the dress because Ava is ....messy and the dress would get snagged on stuff and I just liked it with shorts. After this photo shoot she got on the trampoline and ripped part of the top where the safety pins are..
of course she did. 
I am sooooo in love with this top and want one in my size. Thank you Adrianna for letting me test your awesome pattern and for keeping me entertained and inspired with your blog:)

Wednesday, June 12, 2013

End of Year Teacher Gifts


Tomorrow is Emily's last day of 2nd grade. Can you believe it?? I can't. Gonna go cry now..
Anyway, I wanted to do something special for her teacher Mrs. Feeney. I had the idea to make a personalized print with quotes she might use and are very common with teachers but nothing to sweet and generic; I wanted funny. I asked my sister and my friend Jennifer in Japan (both teachers) what are some fun things teachers are always saying to students. I also grilled Emily about what are Mrs. Feeney's favorite things to say (she was not much  help by the way. She spends 7.5 hours/5 days a week with this woman and she can't tell me one thing she likes to say...). So a list was compiled (of funny and generic sayings) and I started working on it. Then one day I looked over at my giant pretzels drying and thought, what better gift to give a teacher living in Bavaria, Germany than a Giant Pretzel for her wall!! I was sooooo excited by it! More so than the personalized print. I even went on the hunt for the perfect Bavarian/Oktoberfest blue and white check ribbon (amazon.de)

She gave both gifts to her teacher today and I am told they were well received:)
Below is how I dried and sealed the pretzels so skip this part if 
you are not searching google for how to preserve bread! I didn't have a lot of luck when I googled it so I thought I'd share my experiment. My 1st batch was done by spraying the pretzels with clear sealer. They eventually over dried out and fell apart. This second attempt using clear sealer in a can, done on 6 pretzels, has so far held up nicely.
*I had a German bakery make a giant pretzel (about 15"x12") then I left it to dry for about 7 days (just laying on the kitchen counter and flipped once during this time so the bottom isn't soggy from sitting. I figured they were completely dried out once I couldn't press down on them and feel the pretzel give). Then I used a matt indoor/outdoor shellac bought in the aisle that had sealants for wood and other things. 
The can is German and this is what the translation on it is:
indoor/outdoor, clear matt, excellent running, shock and impact resistant, solvent-based . 
I coated the pretzels front and back heavily with a brush and in a large unused litter box lined with a trash bag for easy clean up. I also wore gloves. Then stuck tacks in the bottom of the pretzels to keep them up and off the ground while drying and laid them on wax paper to dry. I let them dry about 24 hours then did a 2nd coat. after another 24 hours I flipped the pretzels so the bottoms could dry. Take the tacks out when you flip them--before they dry. After they are dry check to make sure all cracks are filled and you should be good to go!
*

Ava at school|Super dirty knees|With her BF in the background
*
Below are photos from the Flossenburg Castle Ruins about 20 minutes or so from the Czech border. There is also Flossenburg concentration camp here as well. 


Friday we fly to Scotland for 4 days!! 

Sunday, June 2, 2013

Fabric Covered Wire Letters

Did you see Jessica's Letter Coat Rack post?? Adorable! and So doable! I had seen the original inspiration posts (here and here) but it didn't click that I needed to make this until she posted her versions. I made it thinking I'd put it in my entryway but then decided to move it to my sewing room which I now don't like.. what do you think? Above is my entry and below is one half of my sewing room. I think I don't like it in the sewing room because of that STUPID sloped ceiling that I can't do anything with!!!

What I did to make them:
2. I used 4.5 hangers for parrishpaltz
3. I used 3.5 for schlampe (couple photos down)
4. I used the green fabric two photos down for parrishpaltz by cutting about 8-9 strips each about 1/2" to 3/4" wide by width of fabric leaving the edges raw so they frayed while wrapping.
5. I used a green and white diagonal stripe from the Tasha Noel little red riding hood line for Schlampe BUT I cut the stripes to be about 1" and ironed the edged in on both long sides so when I wrapped the threads it did not unravel as they did on the parrishplatz. 

 When I made my letters I made it so it can be taken apart for storage.
Parrishplatz is 4 pieces and they just hook together 
(see the Z? It hooks to the T at the base of the T.  It hooks together like this: parris-hp-lat-z)
To start wrapping I took the strip, folded the end in and hot glued. Then wrapped a few inches then hot glued. Some places needed more glue than others. I had no idea what I was doing so I just guessed. I had NEVER bent metal before so I had to spell the word out in WORD in a font that looked doable in metal. I had trouble with the A and the S.
Schlampe is a German word ......


Below is the shark bust I made months and months ago. I bought a wooden plaque to put it on but I can't decide the color for the plaque so for now it's on a large spool hanging on a nail. The pattern is this shark pattern from etsy
And below are foamy stars I bought at Pottery Barn Kids (on clearance for about $5) way back when Emily was an only child. I for some reason thought this whole time they were glow in the dark but they're not! I never put them up before. When I got them out and discovered they weren't glow in the dark I thought they might look good covered in favorite fabrics for my sewing room but I DO NOT like them!!!! I wasted my precious heather Ross fabrics. Boo. They don't pop and they look boyish. 

Related Posts Plugin for WordPress, Blogger...